Follow the steps below to create a menu with social icons in the footer.
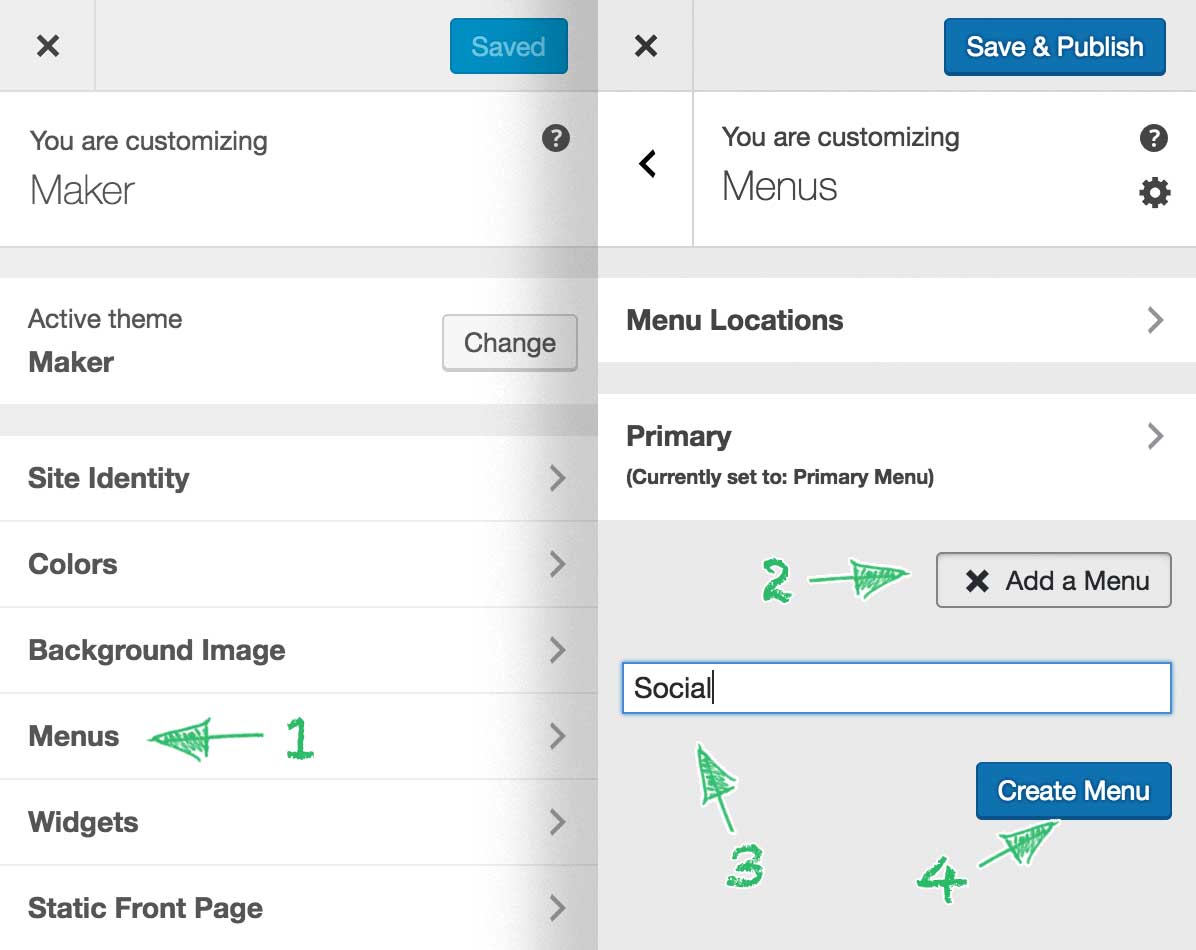
Step 1. Navigate to Menus panel in the Customizer. In the opened section click Add a Menu, type in “Social” (this is very important, icons won’t appear if the menu is called otherwise) in the menu name field and click Create Menu.
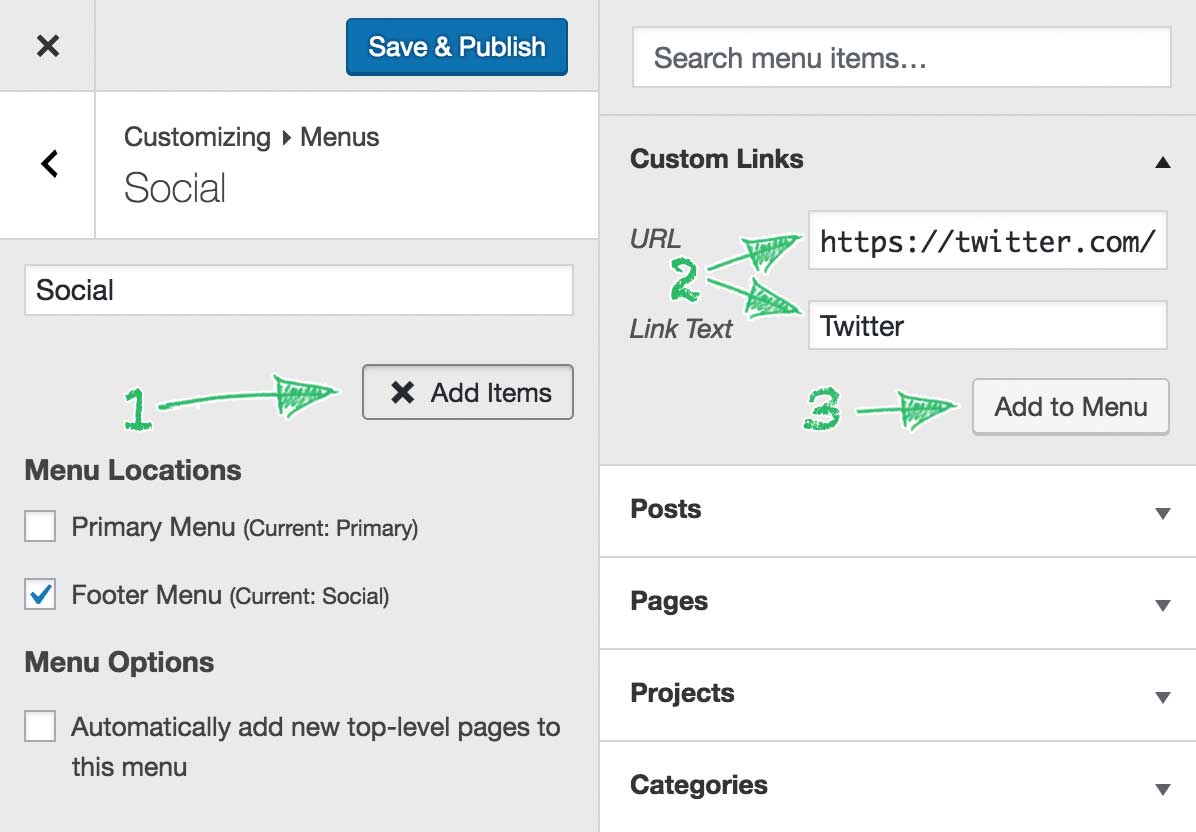
Step 2. Click Add Items, choose Custom Links from the list of menu item types, and enter the link to one of your social profiles in the URL field and the name of the profile in the Link Text field. Click Add to Menu and repeat these steps for each of your social profiles.
Step 3. When done, assign the menu to the Footer Menu location and click Save & Publish.
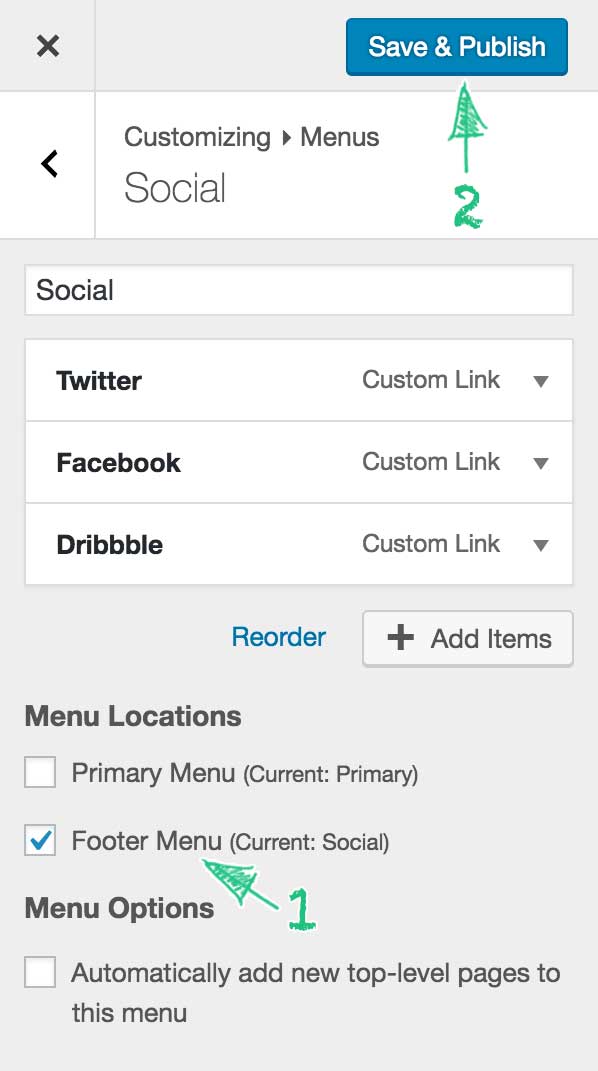
That’s it. You should now see a menu with social icons in the footer.
Supported Icons:
- behance.net
- bitbucket.org
- codepen.io
- delicious.com
- deviantart.com
- dribbble.com
- facebook.com
- flickr.com
- foursquare.com
- github.com
- instagram.com
- last.fm
- linkedin.com
- pinterest.com
- slack.com
- slideshare.com
- soundcloud.com
- spotify.com
- stackexchange.com
- stackoverflow.com
- twitter.com
- vimeo.com
- vine.co
- vk.com
- wordpress.com
- wordpress.org
- youtube.com